
Calibrating your amplifier settings is the single most effective way to squeeze better sound from
your system without buying new gear. This guide walks you through a practical, step-by-step process
— from establishing a clean starting point to gain staging, EQ, crossover setup, and room tuning —
so your music sounds clearer, more balanced, and free of distortion.
- Understanding the Basics
- Initial Setup & Listening Position
- Setting Proper Gain Levels
- EQ Calibration for Clean, Balanced Sound
- Advanced Optimization Tips
- Common Calibration Mistakes to Avoid
- How Music Genres Influence Calibration
- How Room Size & Shape Affect Calibration
- When You Should Consider Upgrading Your Amplifier
- Helpful Resources
- Frequently Asked Questions
What you need
- Reference tracks (lossless preferred) or test tones
- SPL meter app (phone) or measurement mic for precise tuning (optional)
- Known-good speaker & interconnect cables
- Quiet room and time to listen carefully
Understand your amplifier’s core controls
Before you tweak things, know what the main controls do:
Volume (master output), Gain (input sensitivity where present),
EQ (Bass/Mid/Treble), Balance, Loudness, and any
built-in DSP or room-correction modes. Understanding these avoids
accidental clipping, tonal imbalance, or masking of details.
Step 1 — Set a clean starting point
Reset everything to neutral: set EQ controls to 0 (flat), disable loudness and DSP presets, and set
tone controls to the center. Put the amplifier in a direct/pure mode if available. This creates a
consistent baseline so subsequent adjustments are meaningful.
Step 2 — Calibrate input gain
Input gain (or sensitivity) is crucial. If gain is set too high you’ll clip the input and introduce distortion;
too low and you’ll underdrive the amp and lose detail. Use a steady reference track at a reasonable level.
Gradually raise the amp’s input gain until the loudest parts of the track are clean — no distortion, no red clipping indicators.

Practical approach:
- Play a familiar reference track at a listening volume (not max).
- Increase the input/gain until you hear the first sign of strain, then back off slightly.
- If you have a meter, keep peaks below 0 dBFS (or the amp’s clipping indicator).
Step 3 — Calibrate EQ settings
Use EQ sparingly. Prefer subtractive EQ (cutting problem frequencies) to prevent adding noise.
Focus areas:
- Low end: add weight without boom — tighten with -2 to +2 dB adjustments.
- Mids: critical for vocals and instruments — adjust for clarity.
- Highs: add air or tame harshness, small increments only.
A good rule: avoid boosting more than +3 dB. If you need more, check speaker placement or room acoustics first.
Step 4 — Balance, tone & loudness
Set left/right balance so the sweet spot is centered. Tone controls are fine for quick room fixes, but avoid dependence on them.
Loudness boosts low frequencies at low volumes — useful for casual listening, but disable it for critical listening and calibration.
Step 5 — Crossover calibration (if applicable)
If you use a subwoofer, set the crossover so the sub and mains integrate smoothly. Start HPF on mains near 80–100Hz for small bookshelves,
set the sub’s LPF to the same point, and adjust phase and gain until blend is seamless (no hole or boom).
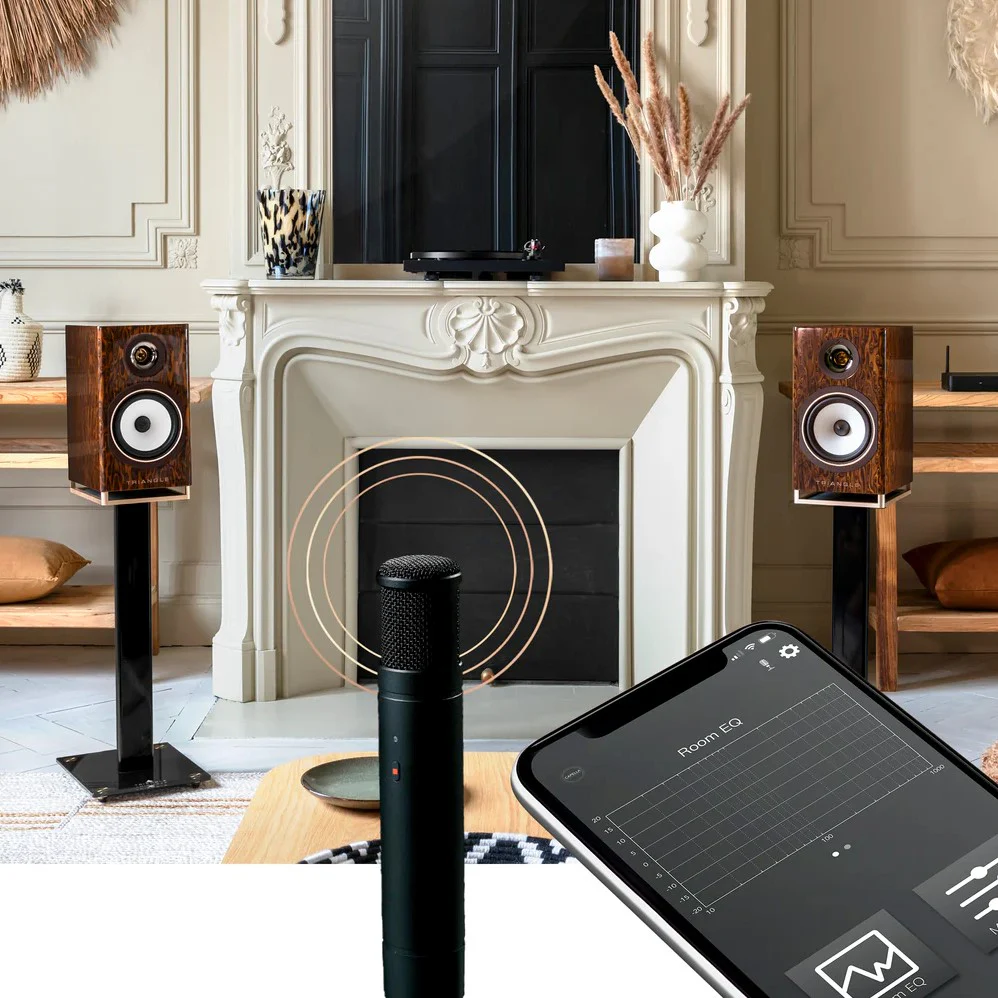
Step 6 — Room positioning & speaker setup
Room and speaker placement often affect perceived tone more than EQ. Use the golden triangle (listening position forms an equilateral triangle with speakers),
experiment with toe-in, and move speakers away from walls to reduce bass boom. If you have a measurement mic and REW/room-correction tools, use them to measure FR and correct problem peaks.
Advanced optimization tips
- Use REW (Room EQ Wizard) or the AVR’s room-correction only after manual calibration — auto-correction can mask speaker/placement problems.
- Check speaker phase: if bass is thin, invert the sub phase or swap polarity on one speaker.
- Use high-quality interconnects for long runs to avoid pickup and loss.
Common Calibration Mistakes to Avoid
Even experienced audio enthusiasts make small mistakes that sabotage their amplifier’s performance. One of the biggest issues is over-boosting EQ bands, which creates distortion, muddiness, and listener fatigue. If your first instinct is to boost bass or treble, it’s usually a sign of an underlying placement or acoustic issue — not an electronic one.
Another frequent mistake is calibrating at very low volumes. Your hearing changes drastically at different loudness levels, especially in the bass range. Always tune your amplifier between 70–75 dB (normal listening volume) for the most accurate results. Calibrating too loud is also problematic because the room may behave differently when objects vibrate or resonate.
Lastly, avoid mixing DSP presets with manual EQ adjustments. Many presets (Cinema, Rock, Hall, Wide, etc.) introduce artificial coloration. Disable them before you begin your calibration process — otherwise, your EQ work will fight against baked-in coloration that you don’t want.
How Music Genres Influence Calibration
Different types of music expose weaknesses in different parts of your calibration. For example, acoustic and vocal recordings are excellent for dialing in midrange clarity, imaging, and tonal accuracy. If vocals sound recessed or boxy, your midrange EQ or speaker toe-in likely needs correction.
Electronic music and hip-hop help reveal low-frequency integration between your subwoofer and main speakers. Listen for “one-note bass,” boominess, or areas where bass disappears — these issues point to improper crossover or poor room placement.
Rock and metal highlight gain staging and treble harshness, especially during complex mixes with cymbals and electric guitars. If instruments blur together, you may need to revisit gain and cut small upper-mid frequencies instead of boosting highs.
How Room Size & Shape Affect Calibration
Your amplifier can only perform as well as the room allows. A small rectangular room often creates bass buildup in corners and along walls, which can trick you into cutting too much low end. If your room is under 14 feet long, try pulling your speakers 15–24 inches away from the wall — this alone dramatically reduces boominess.
In contrast, large open rooms tend to swallow bass and require more careful subwoofer gain and crossover pairing. You may also need to slightly boost midrange frequencies to maintain vocal clarity.
If your room has vaulted ceilings, alcoves, or asymmetrical layouts, you’ll experience uneven reflections. In these cases, a measurement mic or a basic REW sweep can make a night-and-day difference, helping pinpoint problem frequencies rather than guessing.
When You Should Consider Upgrading Your Amplifier
Even the best calibration can’t fix certain hardware limitations. If your amplifier consistently reaches its limits — clipping at normal volumes, overheating, or failing to deliver clean transients — it may be underpowered for your speakers. Bookshelf or floor-standing speakers with low sensitivity (85 dB and below) typically demand stronger amplification.
Another sign you may need an upgrade is persistent noise or hum that doesn’t respond to cable changes or gain adjustments. Cheap internal power supplies or poorly shielded circuits often cause these issues. If your unit lacks modern conveniences like sub-outs, room correction, or high-quality DAC inputs, upgrading can significantly streamline your setup and improve precision.
Helpful Resources
Final checklist & when to call a technician
Quick recap: flat EQ, gain set to avoid clipping, small EQ moves, crossover matched, good speaker placement.
If you’ve followed the steps and still experience distortion, repeated clipping, or strange protection behavior, it’s time to stop and call a qualified technician.
FAQ
Q: Should I use loudness control when calibrating?
A: No — disable loudness during calibration. It artificially boosts bass and treble at low volumes, which hides the true tonal balance.
Q: Is EQ or speaker placement more important?
A: Placement. Fix positioning before relying on EQ. EQ can help but won’t fix major room or placement problems.
Q: How often should I recalibrate?
A: Recalibrate after any significant change (new speakers, moved furniture, new amplifier) or every 6–12 months for reference listening setups.