
Bridging a 4-channel car amplifier lets you combine two channels into one higher-power channel — commonly used to drive a subwoofer or create bridged stereo pairs. This guide covers safe wiring, terminal mapping, and testing so you can bridge a 4 channel car amplifier correctly and avoid damage.
It’s written for DIY installers and enthusiasts working with common car amps (Class-D and Class-AB). If you’re unsure about your specific model, check the manufacturer manual first.
Affiliate Disclosure: AmplifierZone is reader-supported. As an Amazon Associate, we may earn commissions from qualifying purchases at no extra cost to you.
What you’ll need
- Basic hand tools (screwdriver, wire stripper, butt crimper)
- Quality speaker wire (14–12 AWG depending on current) and ring terminals
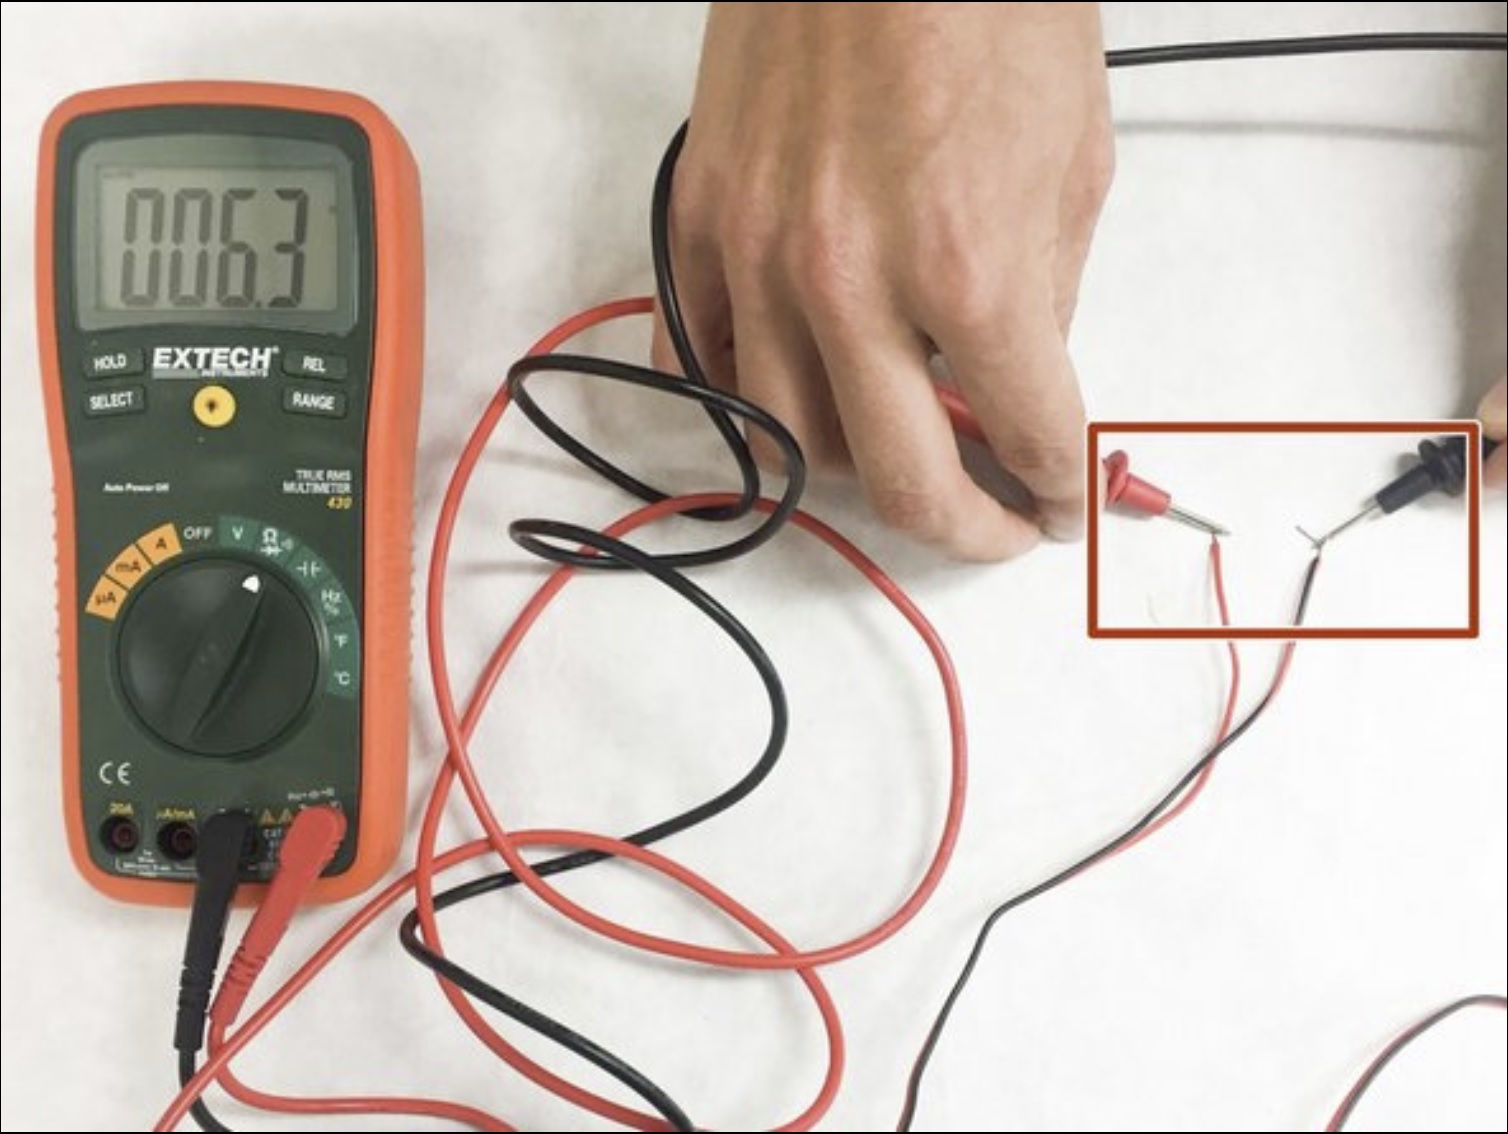
- Multimeter for continuity and polarity checks
- Fuse and fuse holder sized to your amp’s input requirements
- Electrical tape / heat-shrink and cable ties
- Owner’s manual for the amplifier (terminal map and bridging diagram)
Safety first
Always disconnect the vehicle battery negative before wiring to avoid shorts. Work on a non-conductive surface, keep metal tools away from exposed terminals, and size fuses and wiring to the amp’s specifications. If you see smoke, smell burning, or the amp gets excessively hot during a test, stop immediately.
Step-by-step: How to bridge a 4-channel car amplifier
-
Step 1 — Read the amplifier manual and identify bridging terminals
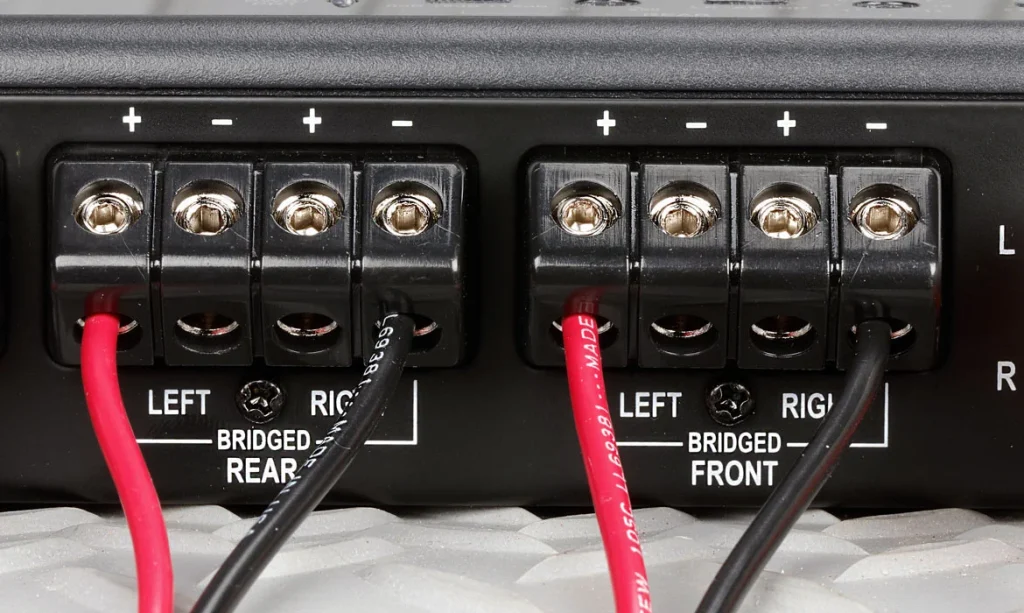
Before touching wires, locate the amplifier’s channel labeling (Front Left = FL, Front Right = FR, Rear Left = RL, Rear Right = RR) and read the manufacturer’s recommended bridging diagram. Some amps use specific terminal pairs for bridging (e.g., +FL with -FR). Do not assume terminals — confirm in the manual.

Typical terminal map — always confirm your amp’s manual for exact bridging pairs. -
Step 2 — Choose your bridged pair (subwoofer or stereo)
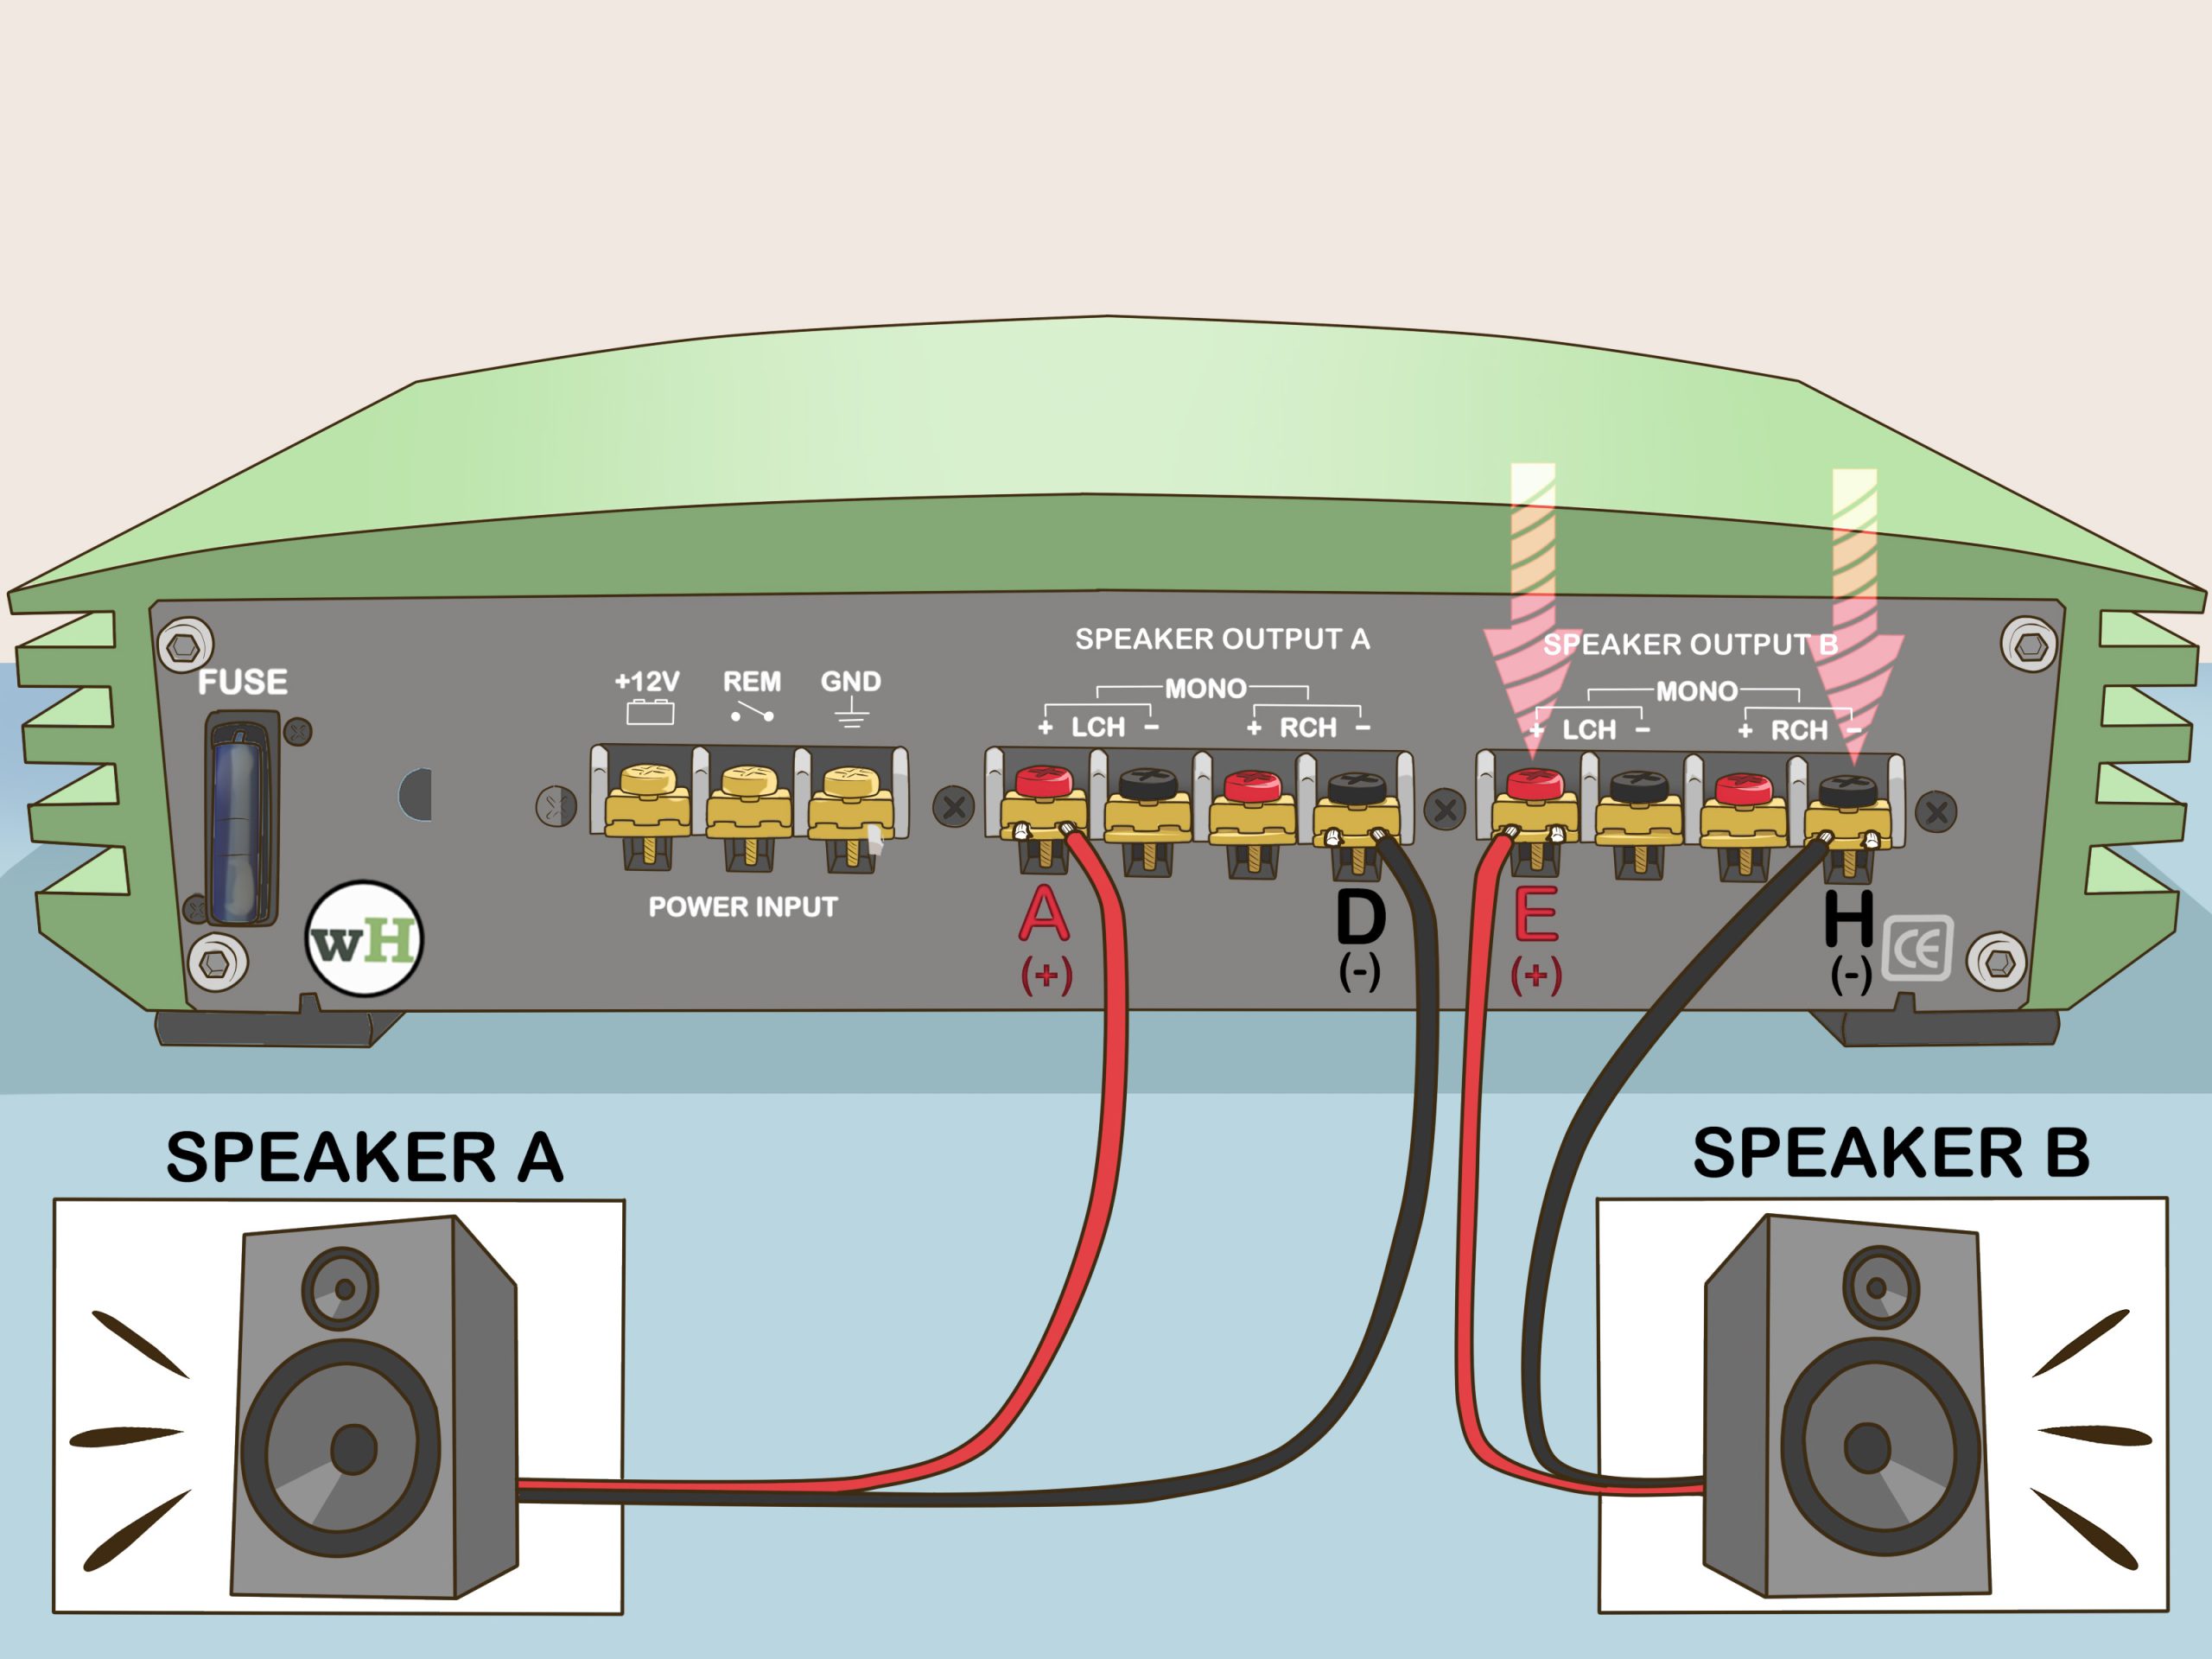
Decide whether you’re bridging channels 1+2 and 3+4 for two bridged channels (stereo) or bridging a single pair for a sub. Common patterns:
- Bridge FL (+) with FR (–) to create a front bridged channel.
- Bridge RL (+) with RR (–) to create a rear bridged channel.
- For a single sub, many installers bridge one stereo pair (e.g., channels 3 & 4) to produce high mono power.
-
Step 3 — Prepare wiring and check impedance
Use the correct gauge speaker wire for the expected current (12–14 AWG for sub loads is common). Check the subwoofer’s impedance — many bridged outputs will present a lower minimum safe impedance to the amp. Never present a load below the amp’s rated minimum impedance (e.g., avoid bridging into 1Ω if the amp warns against it).
-
Step 4 — Make the physical connections (polarity matters)
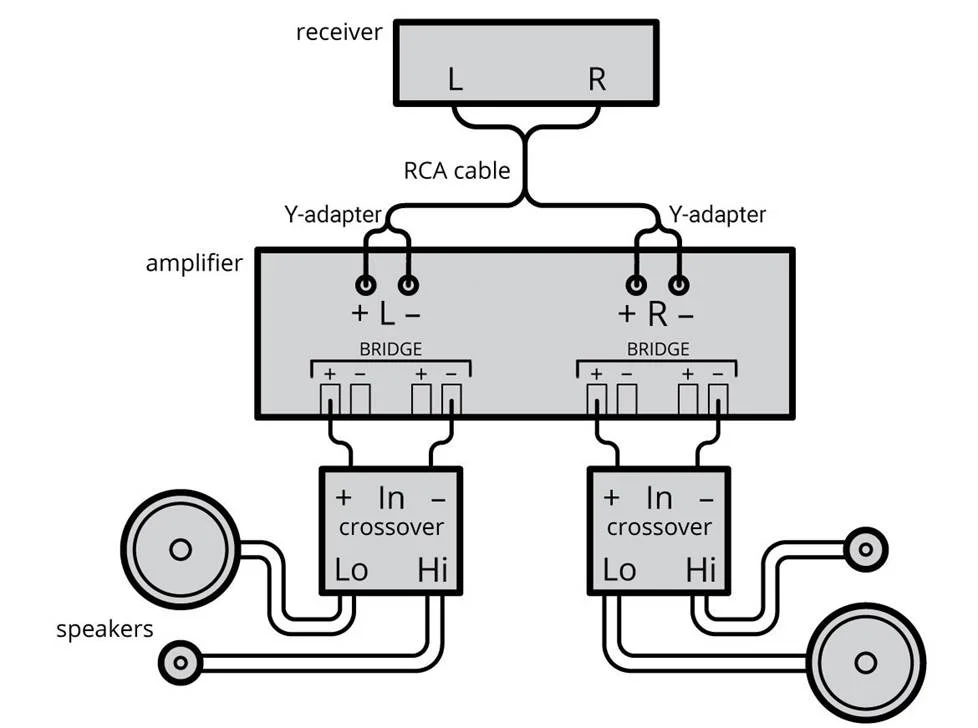
With the battery disconnected, connect speaker wire to the identified bridging terminals. For example, if bridging FL+ with FR–: connect your positive lead to FL+ and your negative lead to FR–. Tighten terminals securely and use ring terminals or quality spade connectors to ensure a solid connection.

Example bridging wiring: FL+ to FR- for a bridged channel. Confirm with your amp’s manual. -
Step 5 — Reconnect battery, set gains low, and test
Reconnect the negative battery terminal, set all amp gains to minimum, and play a clean test tone or familiar track at low volume. Gradually increase gain while monitoring for distortion, heat, or abnormal behavior. Use a multimeter to check speaker-level voltage and confirm continuity/polarity.
-
Step 6 — Fine-tune crossover and gain
For sub use, set a low-pass filter (typically 60–120 Hz) and adjust phase if available. Slowly raise gain to match the head unit level without causing clipping. If you hear distortion, stop and reduce gain — distortion causes overheating and possible speaker damage.
Testing & troubleshooting
If you experience hum, distortion, or low output:
- Double-check terminal polarity with a multimeter.
- Confirm there are no ground loops — ensure a solid single-point ground connection near the amp.
- Check amp protection lights or logs (many modern amps show a protection LED for shorts/overheat).
- Measure speaker impedance — ensure it’s within the amp’s bridged safe range.
Final notes
Bridging a 4-channel amp is a practical way to increase power to a sub or to create higher-power bridged stereo channels — when done correctly. Always consult the amplifier manual first, and when in doubt, seek help from a qualified installer.
For deeper reading and related guides, see:
FAQ
- Can I bridge any 4-channel amplifier?
- Not necessarily. Check the manufacturer manual for bridging support and minimum impedance ratings. Some amps are not bridgeable or require specific terminal pairs.
- Will bridging double my amplifier power?
- Bridging combines two channels to increase available voltage swing and deliver more power to a load, but power gain depends on speaker impedance and the amp’s design; it does not simply “double” output in all cases.
- Is bridging safe for my speakers?
- Yes if you match impedance and avoid overload or clipping. Bridging can present lower effective impedance — always ensure speakers and amp ratings are compatible.